Tidal Tomb Expansion Released!
11 / 16 / 2025Tidal Tomb Dungeon
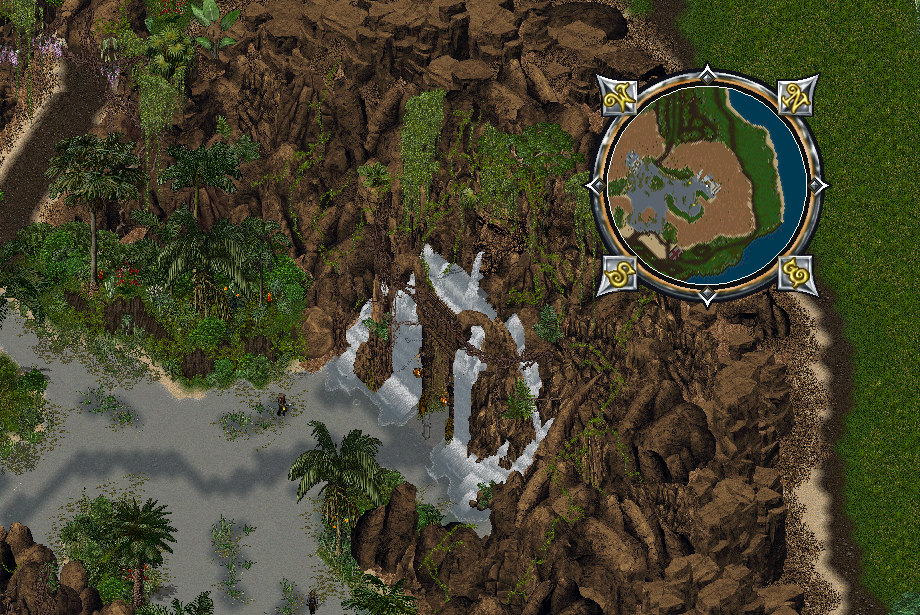
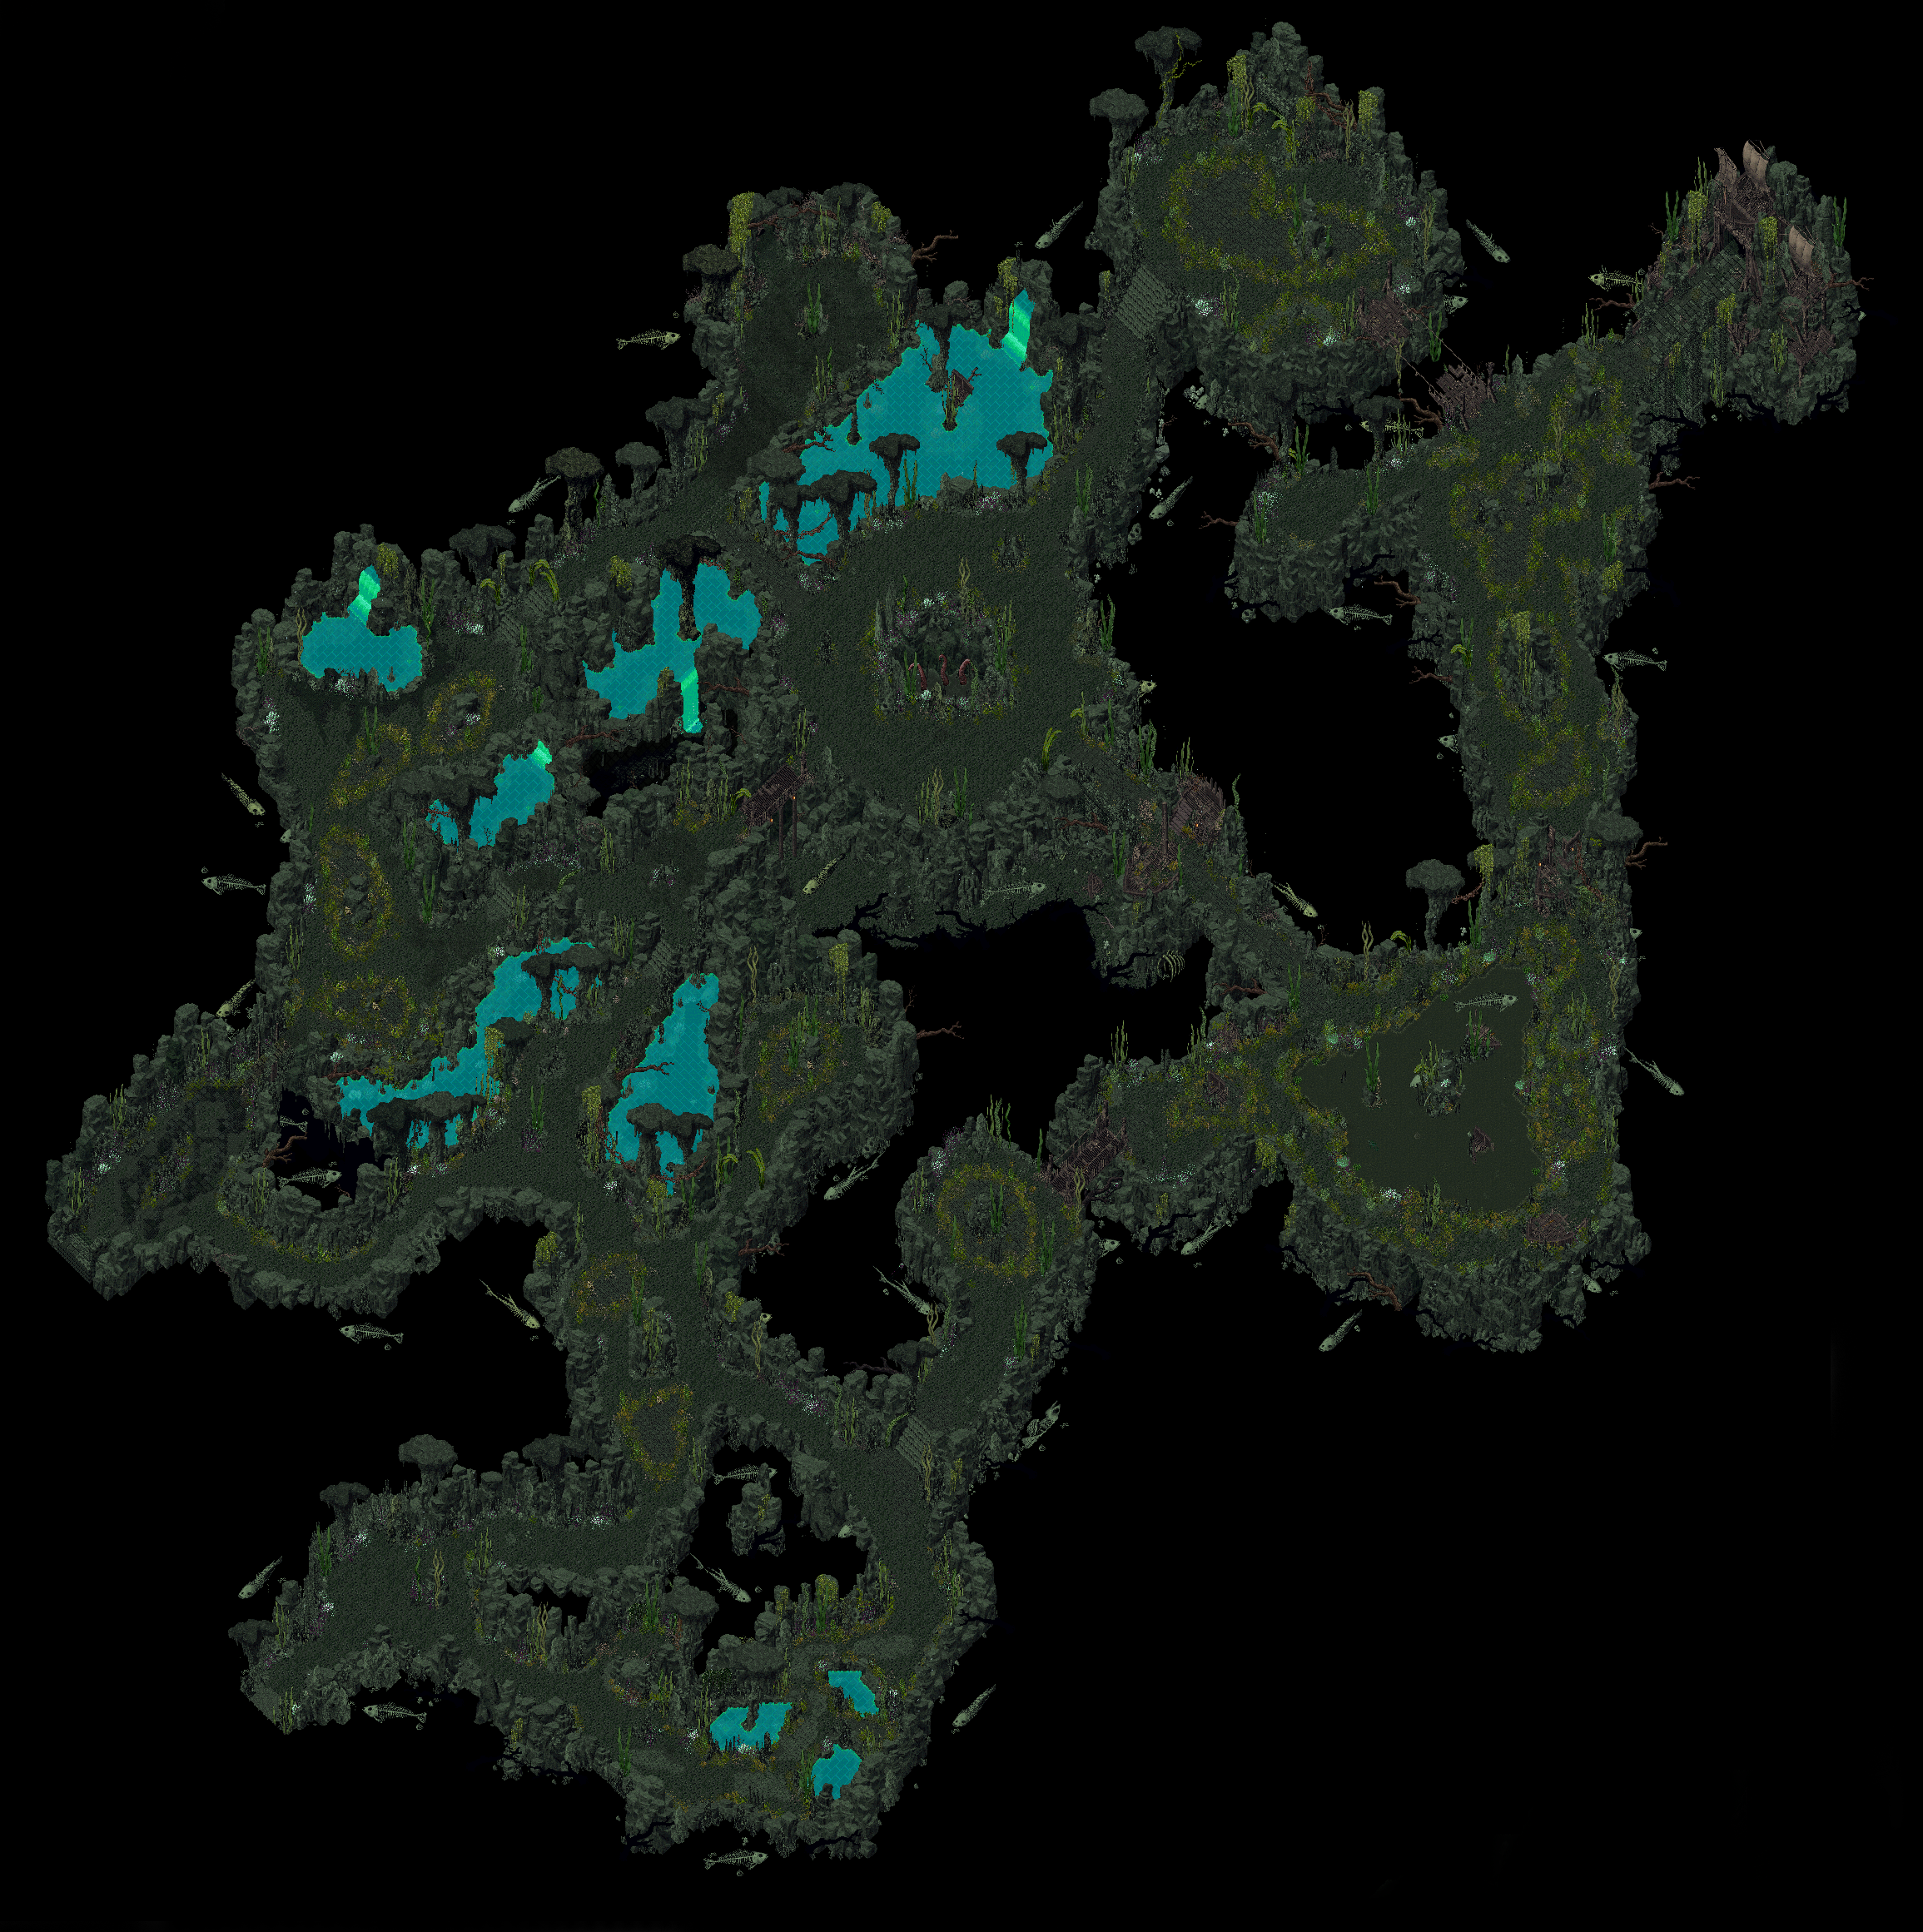
- Players can now gain access to Tidal Tomb Dungeon
Oxygen and Underwater Levels
- Levels 2 and beyond of Tidal Tomb are considered Underwater levels
- Gold drop amounts and Experience Earned are increased by 5% in Underwater levels
- While inside an Underwater level, Players (and their Followers) are subject to the Tidal Tomb’s Oxygen mechanic
Oxygen
- While in an Underwater level, players will slowly lose Oxygen over time
- Leaving the Underwater level, by returning to Level 1 or exiting the Dungeon, will fully refill a player’s Oxygen
- Players can also fully refill their Oxygen from a Recovery Dolphin (explained later)
- A player’s remaining Oxygen amount is displayed in an Oxygen Hotbar displayed for the player
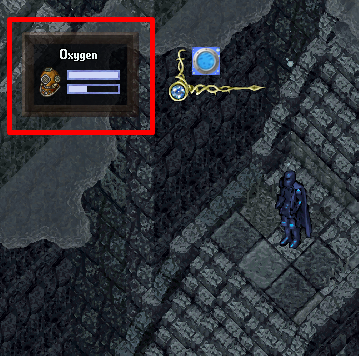
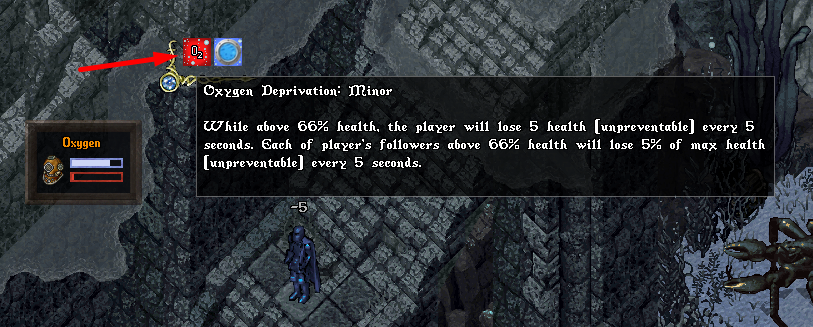
- Players in an Underwater level will also have an Underwater Buff Icon explaining the mechanic

Minor Oxygen Deprivation
- If a player has been Underwater for a total of 10 minutes without refilling their Oxygen, they will enter Minor Oxygen Deprivation
- While in Minor Oxygen Deprivation, the Player will lose 5 Health (unpreventable) every 5 seconds while they are above 66% health (no impact if they are below 66% health)
- While in Minor Oxygen Deprivation, the player’s Followers will each lose 5% of their Health (unpreventable) every 5 seconds while they are above 66% health (no impact if they are below 66% health)
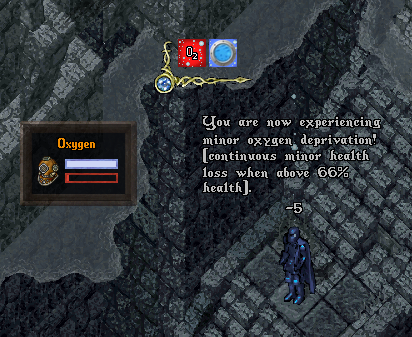
- Players suffering from Minor Oxygen Deprivation will have a Buff Icon explaining the mechanic
Major Oxygen Deprivation
- If a player has been Underwater for a total of 20 minutes without refilling their Oxygen, they will enter Major Oxygen Deprivation
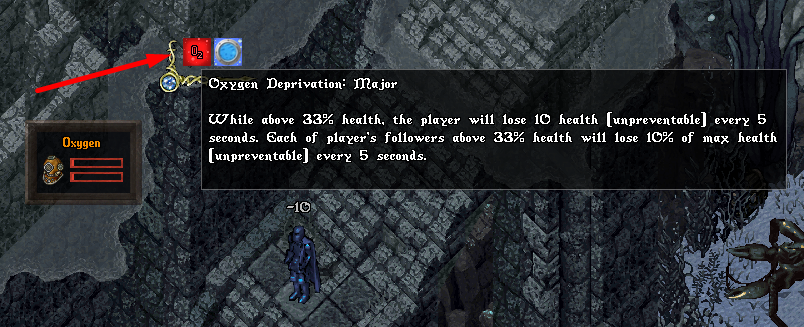
- While in Major Oxygen Deprivation, the Player will lose 10 Health (unpreventable) every 5 seconds while they are above 33% health (no impact if they are below 33% health)
- While in Major Oxygen Deprivation, the player’s Followers will each lose 10% of their Health (unpreventable) every 5 seconds while they are above 33% health (no impact if they are below 33% health)
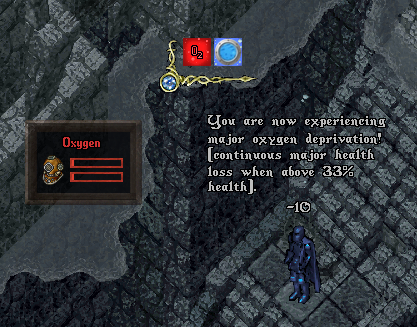
- Players suffering from Major Oxygen Deprivation will have a Buff Icon explaining the mechanic
Recovery Dolphins
- Players will find good natured Recovery Dolphins at the entrances to Level 3 and Boss/Mini-Boss Rooms
- Every 5 seconds, Recovery Dolphins will fully refill the Oxygen levels for all nearby players

Pressure Effect
- Pressure is a new effect type that certain creatures (including Tamables) will now inflict
- When a Pressure effect is applied, it will not immediately inflict any damage
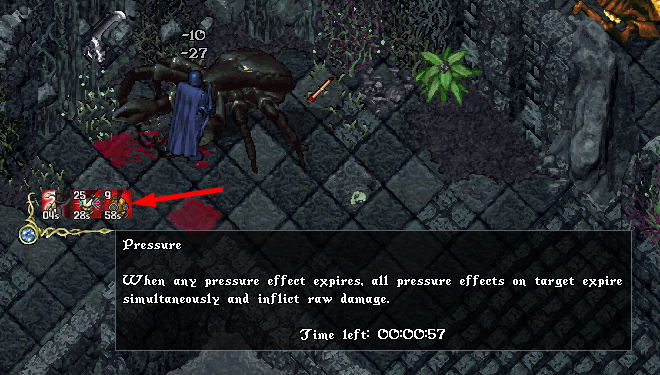
- Instead, when any Pressure effect on a target expires, all existing Pressure effects on the target will resolve simultaneously, inflicting their listed Damage amount as raw damage (ignoring armor)
- Afterwards, all Pressure effects are removed from the target
Example
The following happens to a player:
- Player is hit with a 5 Damage Pressure effect with 15 second duration
- Player is hit with a 10 Damage Pressure effect with 30 second duration
- Player is hit with a 15 Damage Pressure effect with 60 second duration
When the 15 second duration Pressure effect expires on the player, all three Pressure effects will resolve on the player, resulting in the player taking 5 + 10 + 15 = 30 Raw Damage (and then all pressure effects are cleared from the player)
Tidal Tomb Dungeon Hue
- Tidal Tomb Dungeon (Hue 1688)

Boss Rares
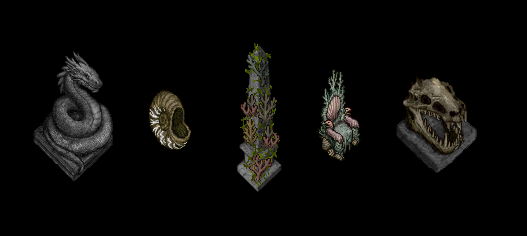
Mini Boss Rares

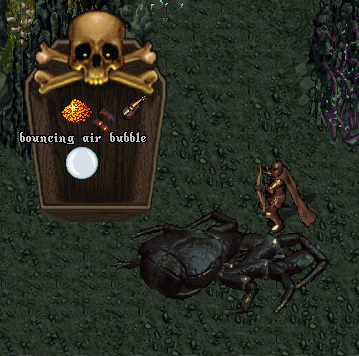
Bouncing Air Bubble
- Players in Underwater levels of Tidal Tomb (level 2 and onward) have an extremely rare chance to discover a Bouncing Air Bubble as a decorative loot item on creature corpses or dungeon chests

Tidal Tomb Dungeon Plants

Tidal Tomb Redline Trophies

Redline System
- The Redline system has been overhauled and has a new menu layout
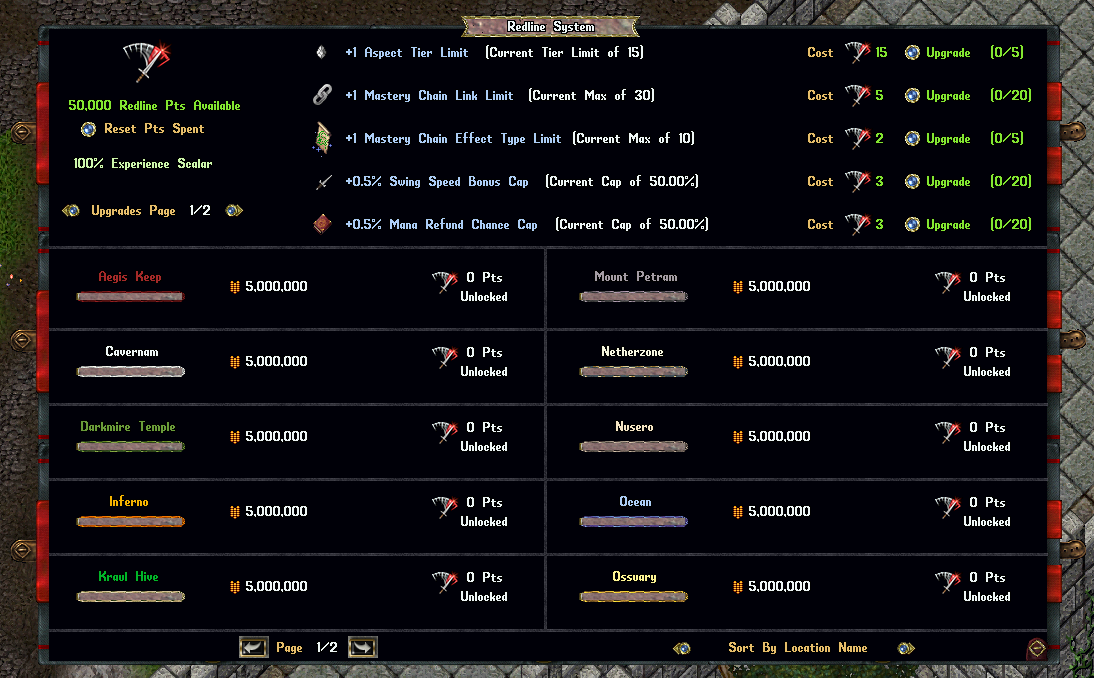
Caps/Max/Limits and Upgrade Counts
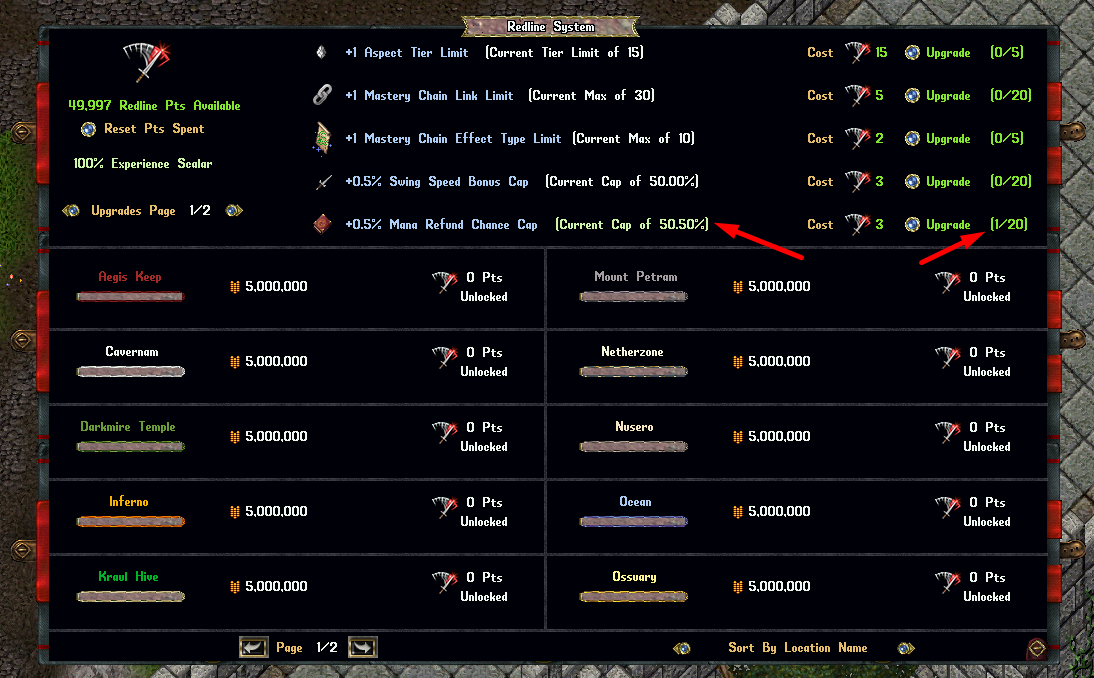
- Each Redline Upgrade type will now display the player’s current Cap/Max/Limit next to it, and will display in light Green text if the player has improved it with Redline upgrades
- Players can now see how many times they have improved a specific Upgrade Type and the maximum number of times it may be upgraded (times/max)
New Upgrade Types
- There are now multiple pages of Redline Upgrade Types that players can switch between using the left/right Upgrades Page arrow buttons
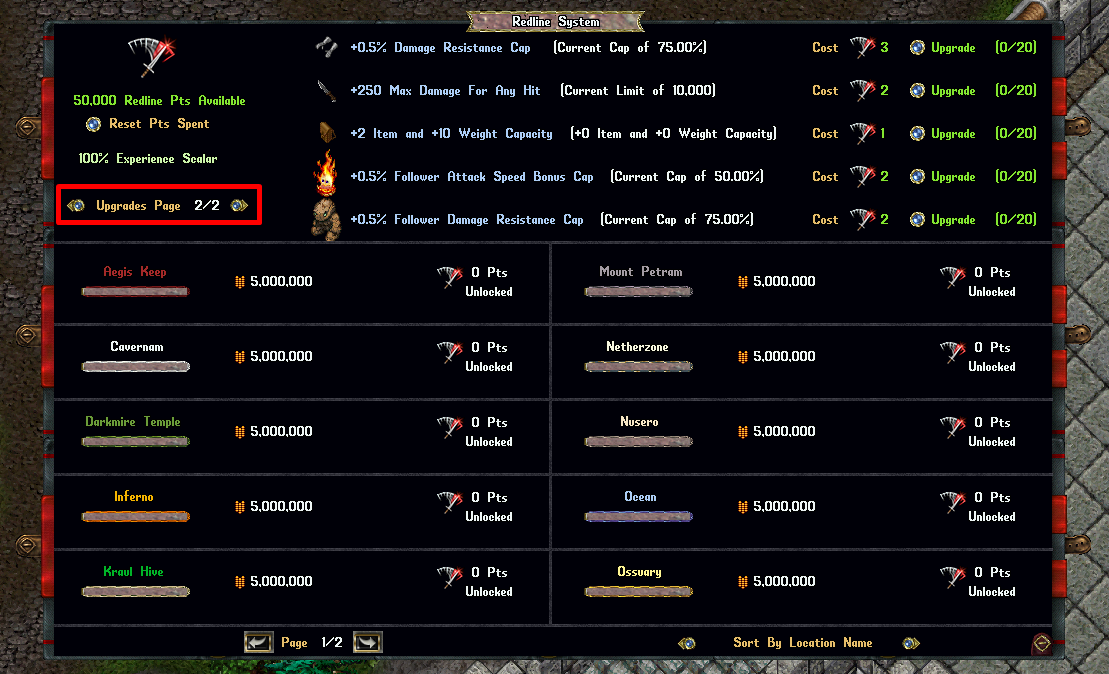
Follower Attack Speed Bonus Cap
- This upgrade allows players to increase the maximum Attack Speed Bonus Cap their Followers can receive from Mastery Chain Links / Taming Bestiary Upgrades / etc (base Cap is +50%)
Follower Damage Resistance Cap
- This upgrade allows players to increase the Damage Resistance Cap for their Followers for any mechanic that provides Damage Resistance to them (base cap is 75%)
Max Damage For Any Hit
- This upgrade increases the maximum amount of damage players are allowed to inflict with any single hit/effect (base cap is 10,000)
Item and Weight Capacity
- This upgrade increases the player’s Item Limit and Weight Capacity for their Backpack
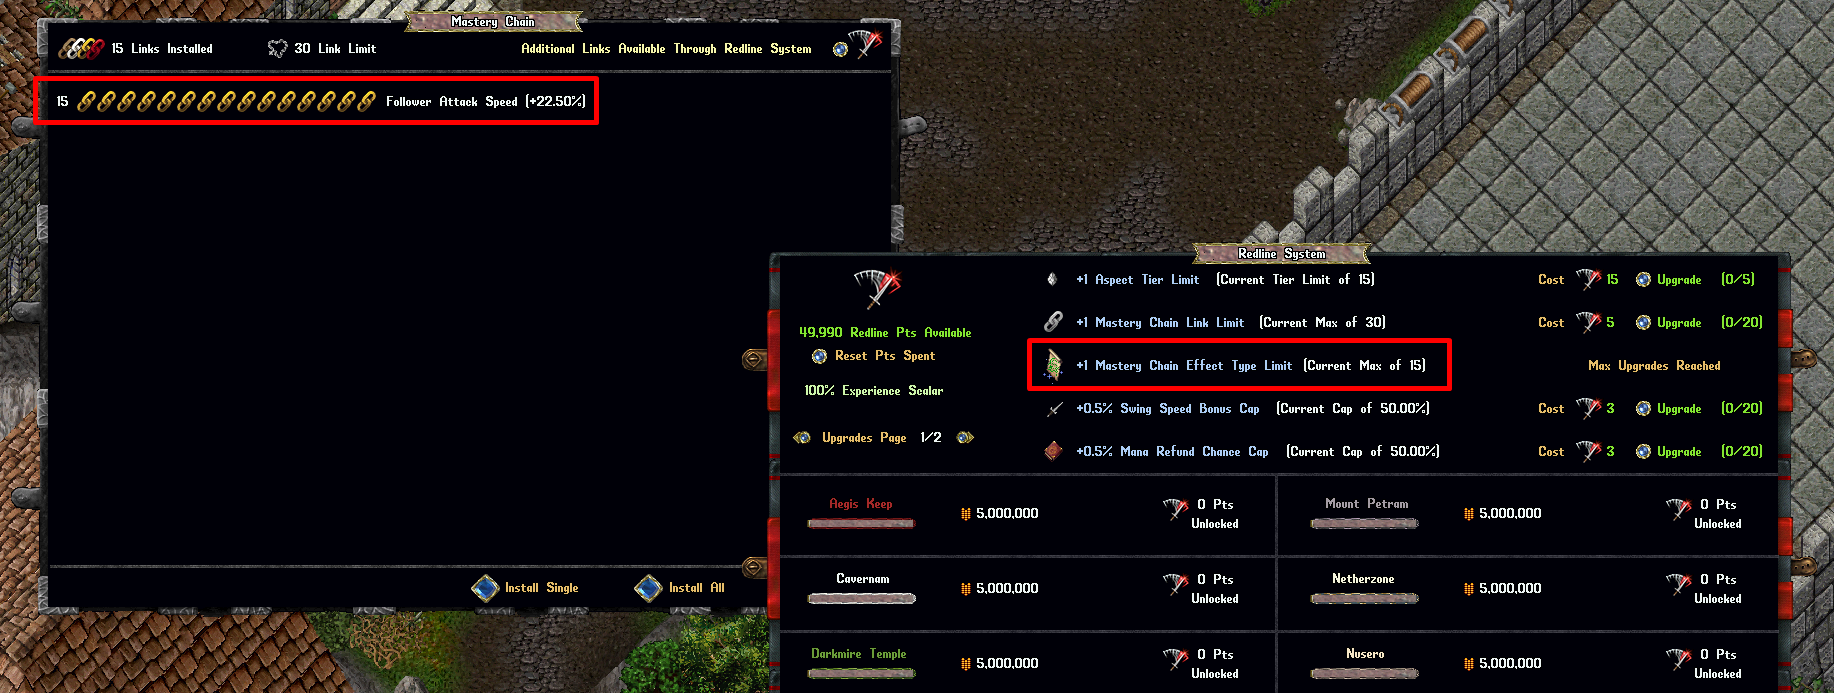
Mastery Chain Effect Type Limit
- This upgrade increases the max number of Mastery Chain Links a player can have installed in a mastery chain that have the same Effect type (base limit is 10)
- For example, a player could normally only install 10 links that increase Follower Attack Speed, but could improve that to a maximum of 15 installable with the Redline upgrade
- Note: Special Loot Chance and Rare Loot Chance links have an exemption and normally can have 20 links installed, which can be increased further increased to 25 with the Redline upgrade
Exceeding Effect Type Limits
- If players ever have more links of a single Effect Type installed in their Mastery Chain than they can support, they’ll see “WARNING: EFFECT TYPE LIMIT EXCEEDED” in red text in their Mastery Chain Menu
- Players will also get a system message warning when they change Echoes or reset Redline Points Spent if their current Mastery Chain exceeds their Effect Type limit for any installed links
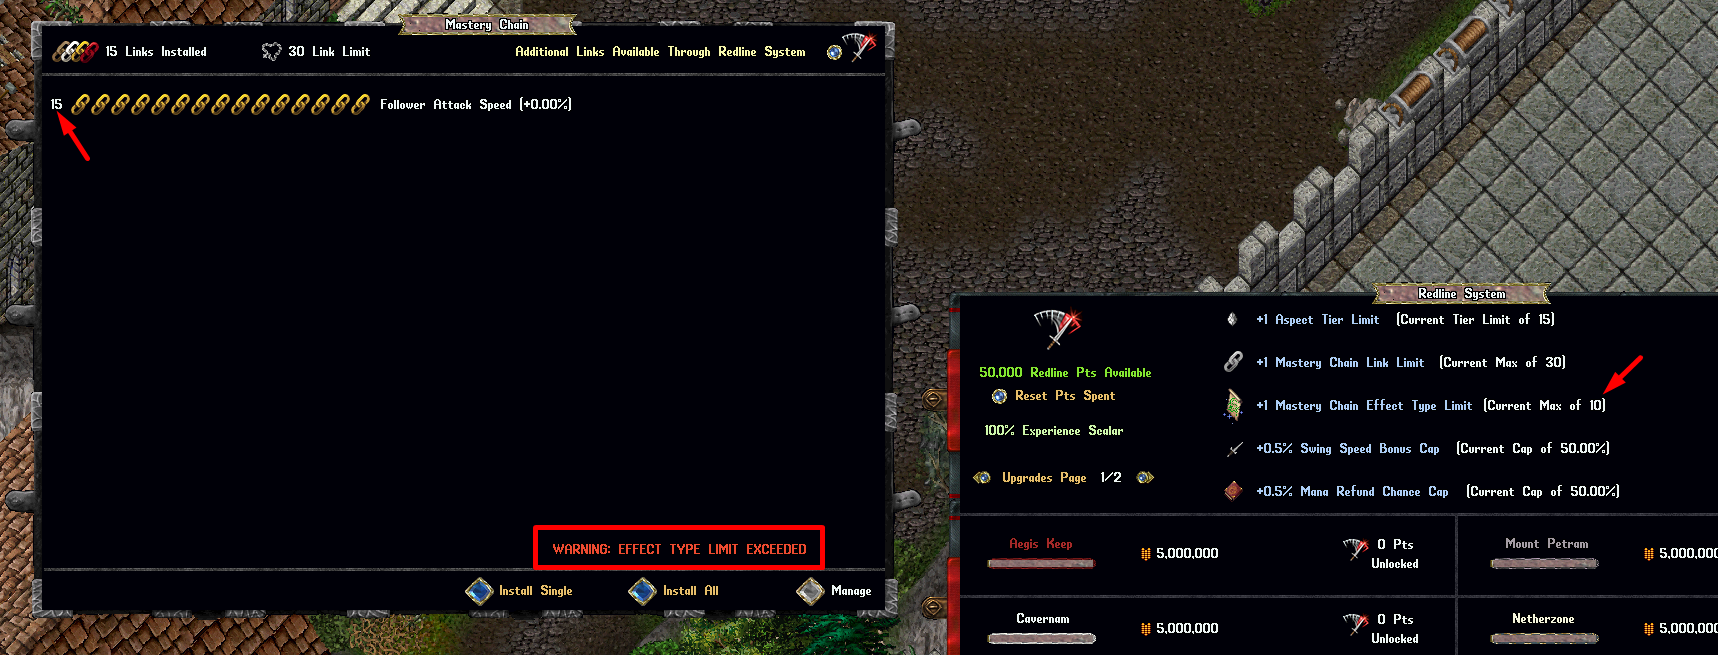
A player has a current limit of 10 links for any Effect Type, but currently has 15 installed for Follower Attack Speed: therefore “Warning: EFFECT TYPE LIMIT EXCEEDED” displays in their Mastery Chain menu
Followers
Experience Levels
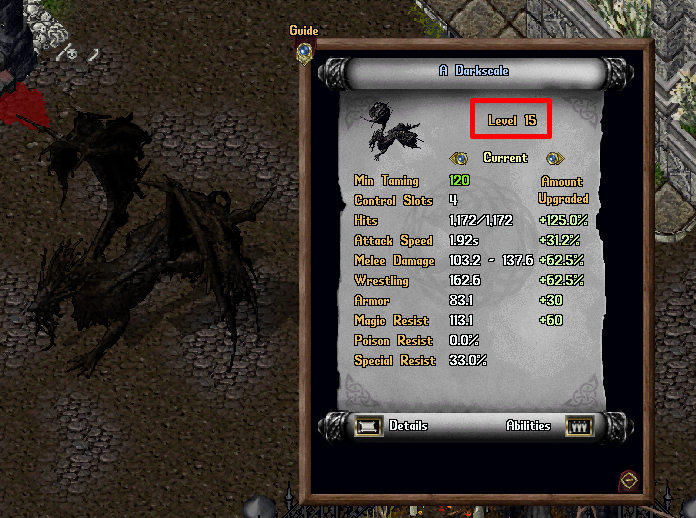
- Players can now level Tamed Creatures up to Level 15
- Experience Amounts needed to increase creatures from Levels 11 to 15 are much larger than normal and increase dramatically with each subsequent level
The amount of Stat and Skill increases Tamed Creatures receive for levels 11 through 15 are as follows:
- Hit Points: +5% Per Level
- Attack Speed: +1.25% Per Level
- Damage: +2.5% Per Level
- Wrestling: +2.5% Per Level
- Armor: +1 Per Level
- Magic Resist: +2 Per Level
- Poisoning: +1.25% Per Level
Earning Creature Experience
- Streamlined the Creature Experience earning code to more closely match those for other player-based Experience Systems (Codexes / Mastery Chain / etc)
- When a player kills a creature, all of the player’s Tamed Followers will earn Creature Experience regardless if they actively damaged the target, so long as they are within 24 tiles (previously only damaging followers would qualify for Experience)
Command Aspect
- Command Aspect will no longer grant bonuses to Taming Chances and Experience Gain (these bonuses have been effectively migrated into the base handling Animal Taming, as per earlier in patch notes)
- Command Aspect now has “Follower Attack Speed Bonus: 2.5 + 0.75% Per Tier”

Follower Attack Speed Overpower
- If a Follower’s Attack Speed Bonuses (from temporary and permanent bonuses) ever exceed their Attack Speed Bonus Cap, any excess amount will be treated as a Damage Bonus for the follower towards other creatures
Example
A player’s Follower has a total of +80% bonuses to Attack Speed from Abilities, Aspects, Bestiary Upgrades, Mastery Chain Links, etc
The Follower also currently has a +60% Attack Speed Bonus Cap
When damaging other creatures, the Follower will receive a (80% – 60%) = +20% bonus to all damage dealt
Melee Attacks
- Followers making Melee attacks against creatures will now have a mininum Hit Chance of 40%
- Followers who miss while making a Melee attack against creatures will gain a cumulative +20% Hit Chance bonus, which will be applied after calculating if Minimum Hit Chance is needed
- Cumulative Hit Chances from this mechanic are cleared when the follower lands a Melee hit
- Note: Some “unique” creatures (such as those for some events or Time Dungeon) that have 200+ Wrestling or are not “intended” to be hit via Melee attacks, will be exempt from these mechanics
Taming Chances
- The Chance to successfully Tame a creature is now (Taming Skill – Creature Min Taming Skill) * 8% [previously was 4%]
- The Minimum Chance to Tame a creature is now 10% (previously was 5%)
Skill Gain
- The rate of Skill Gain for the Animal Taming Skill has been vastly increased
- There is no longer a maximum amount of Animal Taming Skill Gain players can gain from taming an individual creature
- However, creatures that have been successfully tamed one or more times will have a 75% penalty to Animal Taming Skill Gain
Passive Taming
The Passive Taming mechanic has been overhauled and players will no longer “store” Passive Taming points, and instead use the following mechanic:
- Whenever a player kills a creature, each of their Tamed Followers that has a Min Taming that is within 10 Skill Points of the player’s printed Animal Taming skill will contribute towards giving the tamer a chance to make free Passive Skill Checks for the Animal Taming, Animal Lore, and Herding skills (with increased skill gain chances compared to normal)
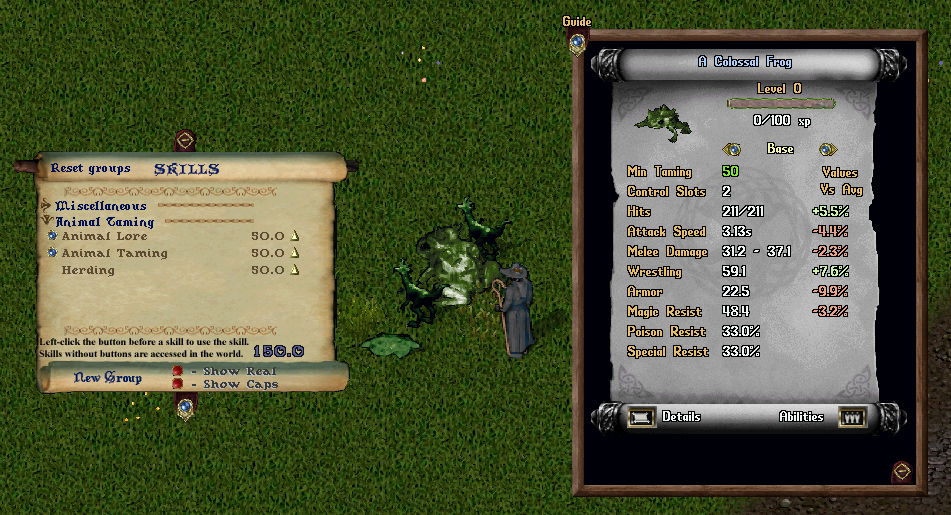
- For example, a player at 50 Animal Taming skill can receive free Skill checks when killing creatures using Tamed Followers that require 40-60 Min Taming, or a player with 90 Animal Taming skill can receive free Skill Checks using 80-100 Min Taming followers, and so on
- Note: Unlike the previous mechanic this is a Skill Check and not automatic skill gain, but it will occur much more frequently and will not require the player to “bank” passive amounts to qualify for it, allowing players to play much, much actively to progress their Animal Taming and related skills
Resolving Passing Taming Skill Checks
- The chance to make free Passive Skill Checks for taming skills when killing a creature is: (Gold Value Earned By Player * Taming Skill Scalar * (Valid Follower Count / 5) / 1000)
Taming Skill Scalar is a scalar bonus players receive at different of printed Animal Taming skill as follows:
- 0-50 Taming Skill: 10.0 Scalar
- 50.1-55 Taming Skill: 8.0 Scalar
- 55.1-60 Taming Skill: 7.0 Scalar
- 60.1-65 Taming Skill: 6.0 Scalar
- 65.1-70 Taming Skill: 5.0 Scalar
- 70.1-75 Taming Skill: 4.0 Scalar
- 75.1-80 Taming Skill: 3.5 Scalar
- 80.1-85 Taming Skill: 3.0 Scalar
- 85.1-90 Taming Skill: 2.5 Scalar
- 90.1-95 Taming Skill: 2.25 Scalar
- 95.1-100 Taming Skill: 2.0 Scalar
- 100.1-105 Taming Skill: 1.75 Scalar
- 105.1-110 Taming Skill: 1.5 Scalar
- 110.1-115 Taming Skill: 1.4 Scalar
- 115.1-120 Taming Skill: 1.3 Scalar
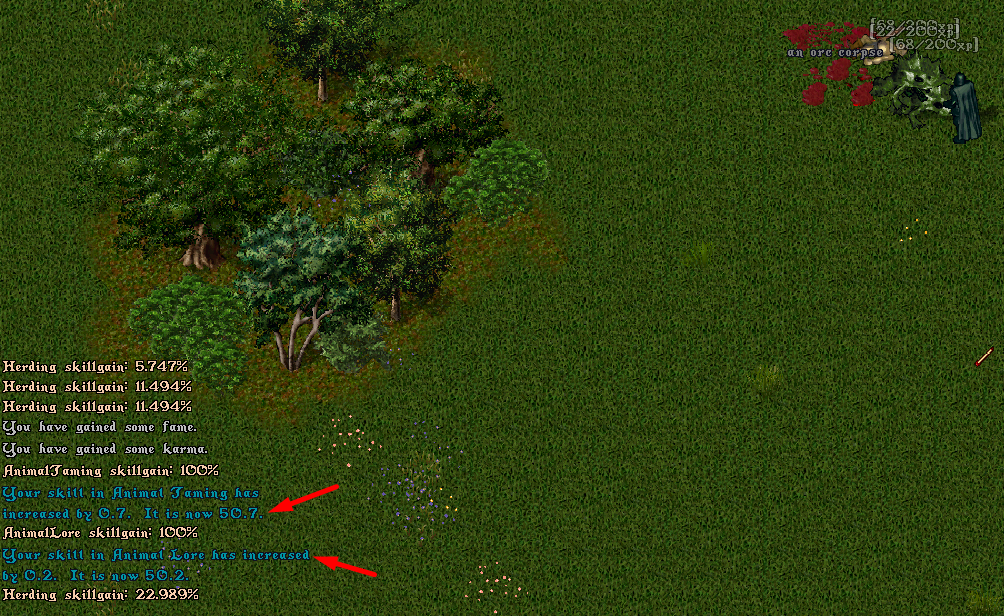
A player triggers a Passive Taming Skill Gain check upon killing a creature with their tamed followers
Example
A player with 50 Animal Taming skill is using 2 Colossal Frogs that have a Min Taming of 50 and each take up 2 Control Slots (for a total of 4 slots)
The player and their followers deal damage to an Orc that is killed, and earn 100 Gold from it
The player would have a (100 * 10 * (4 / 5) / 1000) = 80% chance to get a free Passive Skill check for taming skills
Making Passive Skill Checks
If a player receives a free Passive Skill Check, they will make skill checks for the following skills:
- Animal Taming with x2 skill gain chance (compared to normal skill use)
- Animal Lore with x4 skill gain chance (compared to normal skill use)
- Herding with x10 skill gain chance (compared to normal skill use)
Cooldown
- Once a player receives a Passive Taming Skill Check, they will have a 15 second cooldown before another one can occur for the player
Healer’s Codex
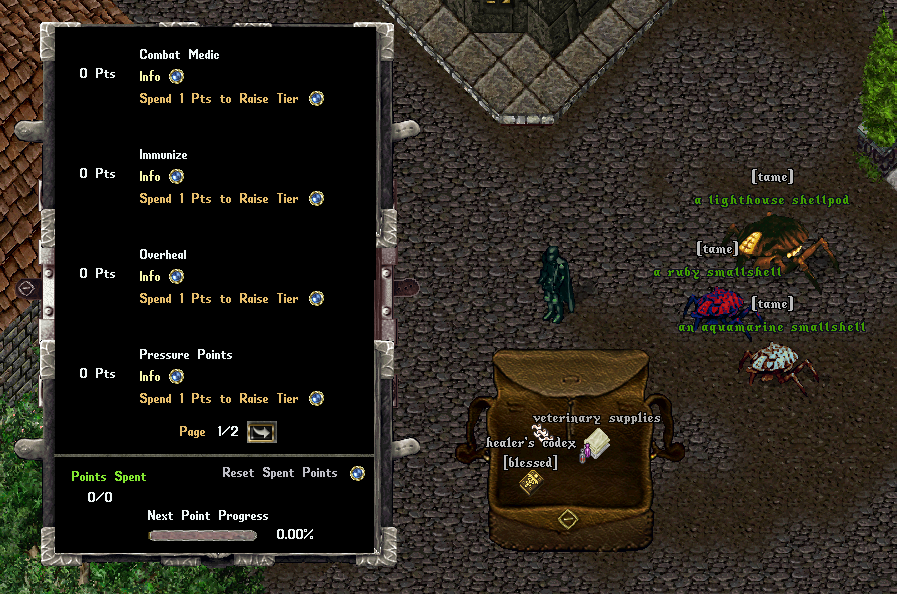
- Healer’s Codex upgrades will now apply to a player’s Followers
- Healer’s Codex upgrades will now work when the player either Bandages a target, or uses a Veterinary Supplies
- To use a Healer’s Codex, players must now have either at least (80 Healing + 80 Anatomy) or at least (80 Veterinary + 80 Animal Lore) printed skill
Veterinary Supplies
- When using Veterinary Supplies, any applicable Healer Codex upgrades will apply to the Player and all Followers in range
- The Self Treatment upgrade will not work for Veterinary Supplies
Upgrade Descriptions
The Upgrade Descriptions for Healer’s Codex upgrades have been adjusted to remove the word “Bandaging” and will now use the word “Healing” (as it now applies to Bandages and Veterinary Supplies)
Descriptions are now as follows (no mechanical changes):
Combat Medic
Patients receive a (3% / 6% / 9%) bonus to damage resistance over the next 15 seconds (cannot stack)
Immunize
Patients for the next 15 seconds have a (33% / 66%/ 100%) chance for new poisons to apply at 1 level lower. New bleed and disease effects will be applied at (10% / 20% / 30%) reduced damage (cannot stack)
Overheal
An additional (10% / 20% / 30%) of healing amounts are applied to patient divided over the next 3 seconds
Pressure Points
Player’s Melee damage increased by (7% / 14% / 21%) against creatures
Self Treatment
Reduces time needed to bandage self by (1 / 2 / 3) seconds (will not apply to veterinary supplies)
Specialist
Increases patient healing amounts and chance to cure or resurrect by (10% / 20% / 30%) of normal
Triage
Patient receives a (3% / 6% / 9%) bonus to damage resistance while in the process of being healed with bonus doubled if patient is below 33% health (cannot stack)
Paragons
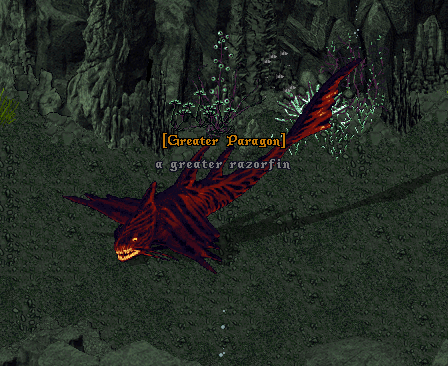
- When creatures spawn as Paragons, they will now appear as one of three types of Paragon: Lesser Paragon, “regular” Paragon, or Greater Paragon
- Lesser Paragons (60% Chance) have a moderate bonus to Stats and Skills
- Paragons (30%) have a large bonus to Stats and Skills
- Greater Paragons (10%) have a very large bonus to Stats and Skills
- The Paragon Chest found on the corpse of the creature will always match the Paragon type of the creature (i.e. Greater Paragons will always leave a Greater Paragon Chest)
Challenger Dungeon
Concept
During Friday Night Reset each week, one of our core dungeons (Nusero, Pulma, etc) will be randomly selected as the Challenger Dungeon for the duration of the next week
While a dungeon is a Challenger dungeon, all normally occuring creature spawns inside of the dungeon will be upscaled in their Stats and Skills similar to that of a Lesser Paragon

Viewing the Challenger Dungeon
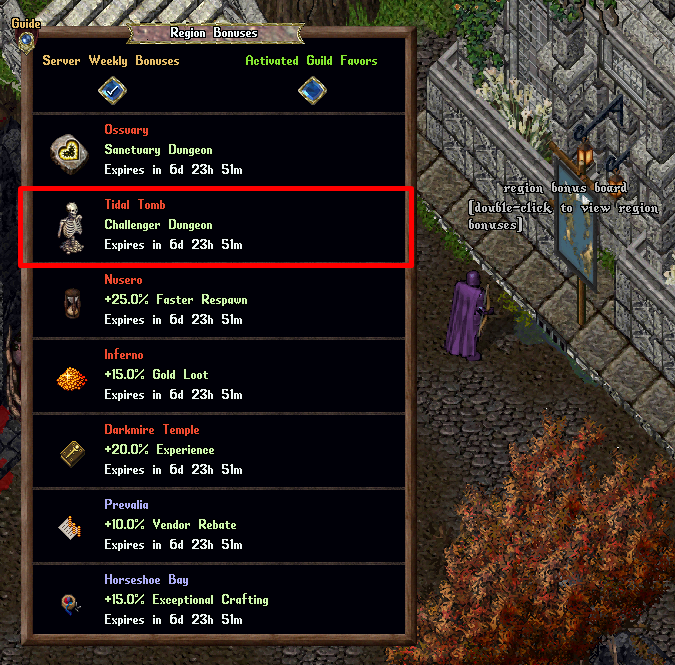
- The current Challenger Dungeon will always be listed near the top of the Region Bonuses menu that players can access by double-clicking any “Region Bonus Board” near each Bank in town
- Players can also view the current Challenger Dungeon from any Donation Map in a house (purchasable in the Prevalia Market)
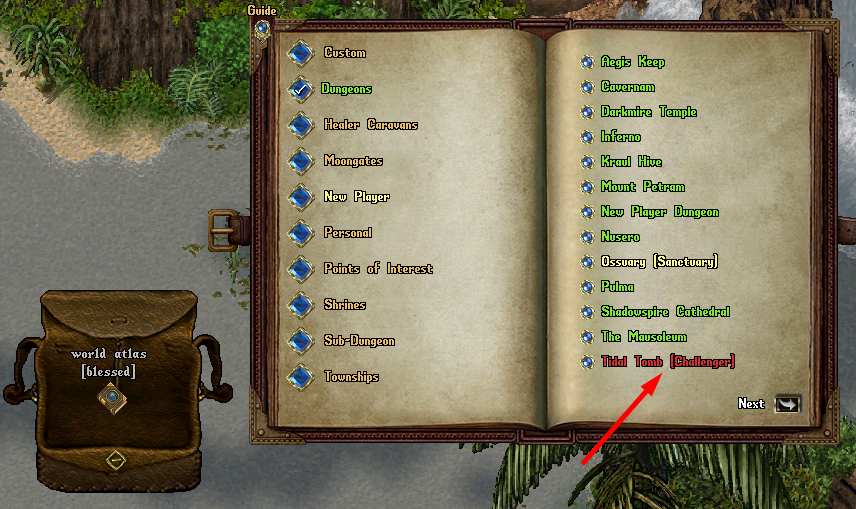
- The current Challenger dungeon will be displayed in Red text in any Atlas listing
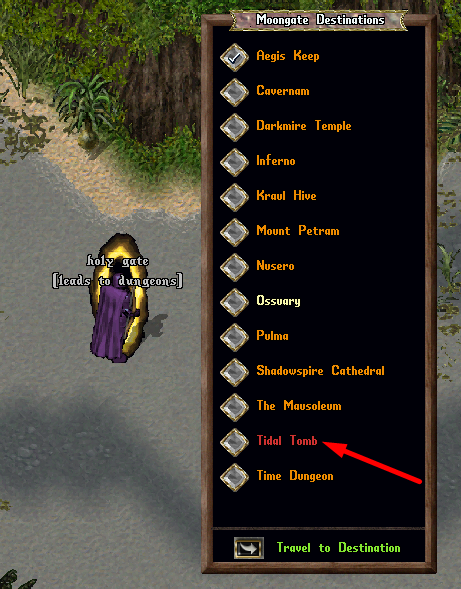
- The current Challenger dungeon will be displayed in Red text in any Moongate Destination listing
Spawns
- When Friday Night Reset occurs, all spawned creatures in the previous week’s Challenger Dungeon and the new week’s Challenger Dungeon will immediately despawn (deleted) to ensure we don’t have lingering creatures with incorrect stats
- For the duration of the week, all newly spawned creatures in the new week’s Challenger Dungeon will upscale their Stats and Skills as if they were a Lesser Paragon
Upscaling
- When a Challenger dungeon creature is upscaled, it will recalculate its “DifficultyValue” based on the changes in Stats and Skills, and automatically adjust its Gold Value and Experience granted to players on death (similar to how Paragons are adjusted)
- Effectively, all creatures in a Challenger dungeon will be worth more Gold and Experience because they have higher Stats and Skills than normal

Paragons
- Paragon Creatures can still occur inside of Challenger Dungeons and will be even further upscaled (potentially resulting in some very difficult creatures!)
Sanctuary Dungeon
- Dungeons will never occur as a Sanctuary Dungeon and Challenger Dungeon simultaneously
Valid Dungeons
- All “core” dungeons such as Nusero, Pulma, Kraul Hive, Shadowspire Cathedral, etc can become a Challenger Dungeon
- Time Dungeon and New Player Dungeon will never be considered for Challenger Dungeon status
- Wilderness and Ocean will never be considered for Challenger Dungeons status
Society Jobs and Guild Favors
- Society Jobs will occur for the Challenger Dungeon as normal
- Guilds will not be able to activate Guild Favors for a Challenger Dungeon
- If a guild already has a Guild Favor activated for a dungeon that becomes the Challenger Dungeon, and the Guild Favor has 50% or more of its duration remaining, it will be refunded to the Guild
Mini-Bosses and Bosses
- Mini-Bosses and Bosses, along with their spawned Minions, will not be affected by Challenger Dungeons and will not upscale
Achievements
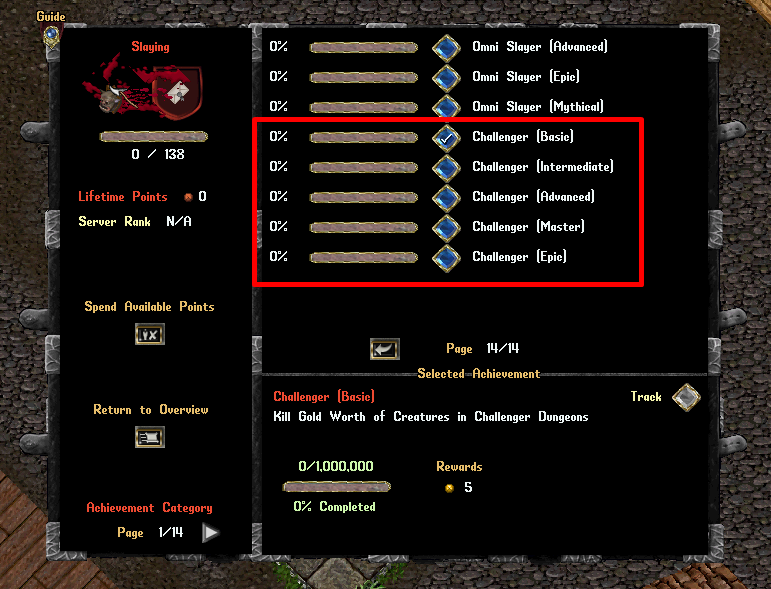
- Players can now complete Challenger Achievements under the Slaying category for killing creatures inside of Challenger dungeons
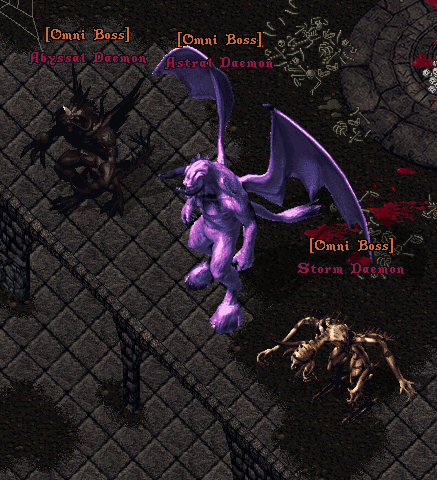
Omni Bosses
- All Omni Bosses have been redesigned and have all new Abilities
- Players should find Omni Bosses much more threatening and a greater challenge to tackle
Factions
Faction Kills
- Basic Faction Kills are now worth 150 Faction Score
- Upgraded Faction Kills (Near Flags / Castles / Wayposts, Near VIPs or Faction Caravans, at Contested Bosses, Omnis, etc) are now worth 300 Faction Score
- Flag Carrier Kills are now worth 450 Faction Score
Faction VIPs
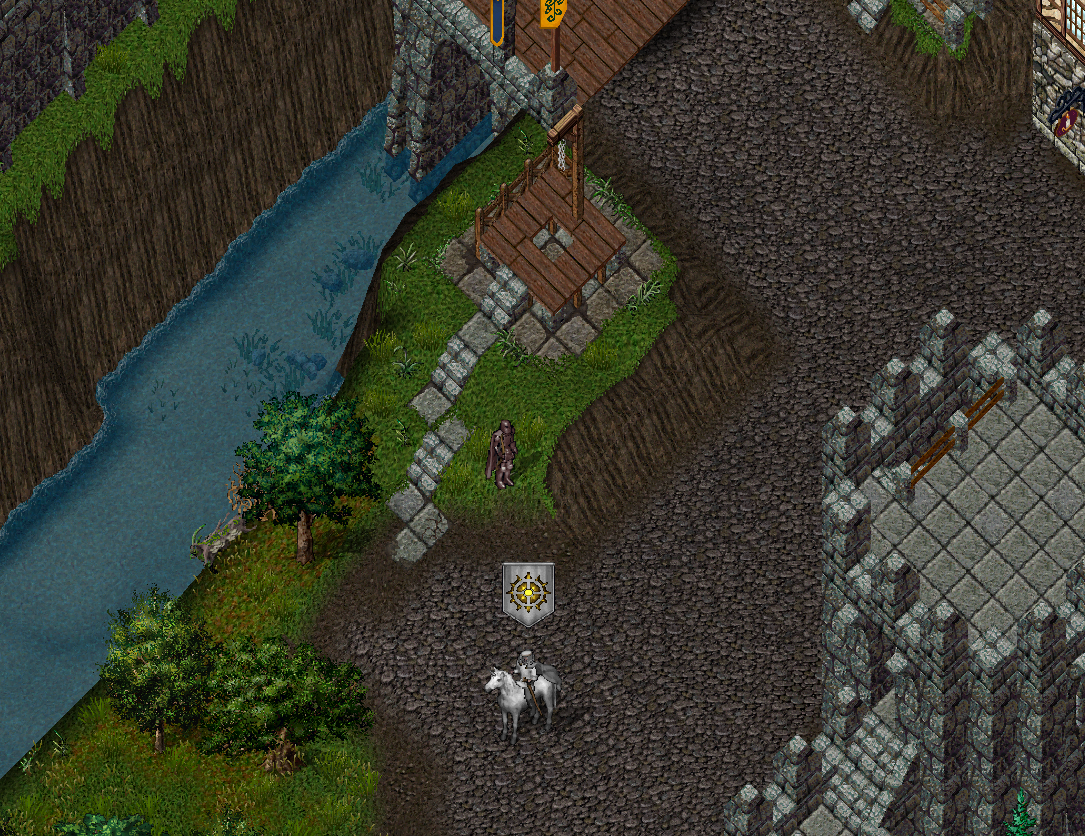
- Faction VIPs will now spawn outside of their respective Faction Castles a short distance from the main gate
- When a Faction VIP spawns, the Walls of that Faction Castle will no longer be repaired, and the Main Gate of that castle itself will be removed
- Players from Opposing Factions will no longer be automatically ejected from the Faction Castle at which a VIP spawns
VIP Mechanics
- The Faction VIP will exist for 10 minutes (same as before)
- All Factions can now attack the the Faction VIP; there is no longer a “defending” Faction
VIP Scoring
- Every 15 seconds, any player who damaged the VIP within the last 15 seconds will earn 15 Faction Score if their Faction was the only Faction to have damaged the VIP during that time
- Players will not earn any Faction Score if they are Hidden or have a Faction Death Penalty in effect
- Damaging Faction Walls while a VIP is present will no longer be worth additional Faction Score
Kills Near VIPs
- Any valid Faction Kills occuring within 100 tiles of the Faction VIP are considered Upgraded Faction Kills for increased Faction SCore
Ocean
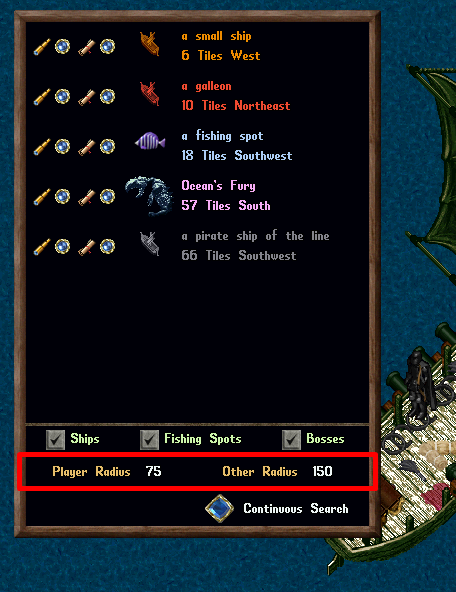
Spyglasses
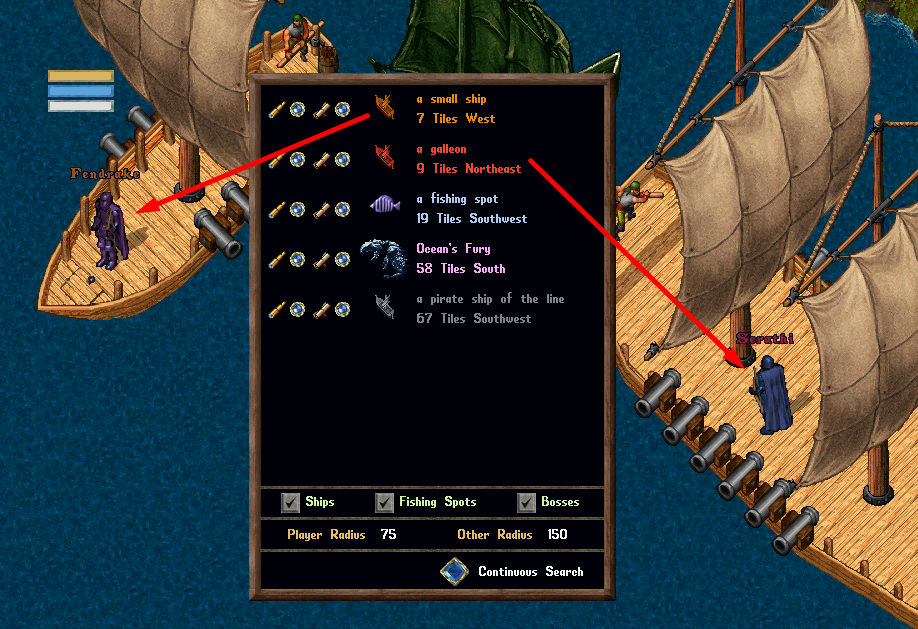
- Spyglasses will now show what the player’s Search Radius is towards Player Ships and Other Entities (NPC Ships, Bosses, Fishing Spots, etc)
Search Result Colors
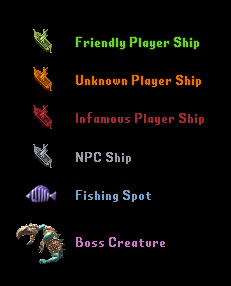
The colors for various Search Results for a Spyglass have been updated as follows:
- Friendly Player Ship: Green
- Unknown Player Ship: Orange
- Infamous (30+) Player Ship: Red
- NPC Ship: Grey
- Fishing Spot: Blue
- Boss Creature: Pink
Infamy and Ocean Notoriety
- By default, players on the ocean will display as Orange to other players (unless they are Friendly to the player)
- Any player who has 30 or more Infamy will display as Red in search results and in game (unless they are Friendly to the player)
- Note: Players will still receive Search Radius adjustments for having less than 30 Infamy: they simply receive Red display status when they reach 30 or higher
Infamy Kills
- Killing or Sinking another player who has 30 Infamy or more (and appears Red) will not result in earning Infamy
NPC Ship Aggression
- NPC Ships of the Fishing, Merchant, Explorer, and Tradesman factions will now be aggressive to player ships by default (no longer neutral)
- Increased the Doubloon value of Fishing Ships
- Rebalanced the baseline Cannon Accuracy of NPC Ship Factions for “monstrous” factions such as Daemons, Hive, etc
Treasure Fleet Ships
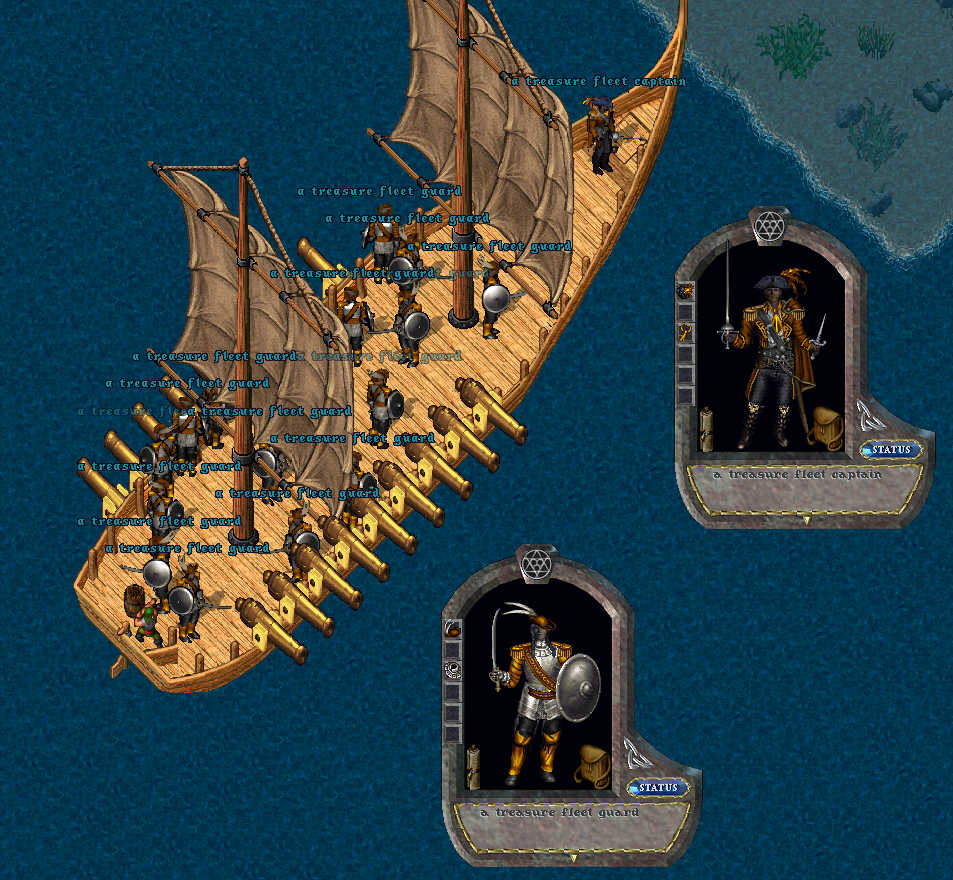
- Treasure Fleet ships, which previously only appeared during the Mid-Sea event, will now occur as very rare NPC Ships year round
- Treasure Fleet ships will always have at least 1 guaranteed Crewmember Contract or Ship Upgrade Deed in additional to normal loot rolls for Contracts or Upgrade Deeds occuring
- Treasure Fleet ships can now occur as Paragon versions

Castaways
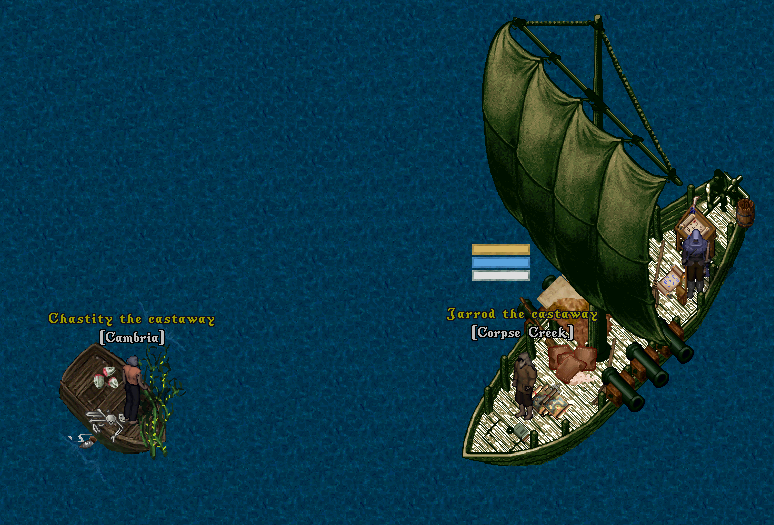
- Players will now have a chance to encounter Castaways while at sea
- Castaways are NPCs that will occasionally spawn on Fishing Spots and on NPC Ships
- Each Castaway has a target Town destination they must to be returned to
Accepting Castaways
- Players can accept a Castaway onto their ship by approaching within 8 tiles of it and using the “Accept Escort” shift-click menu option
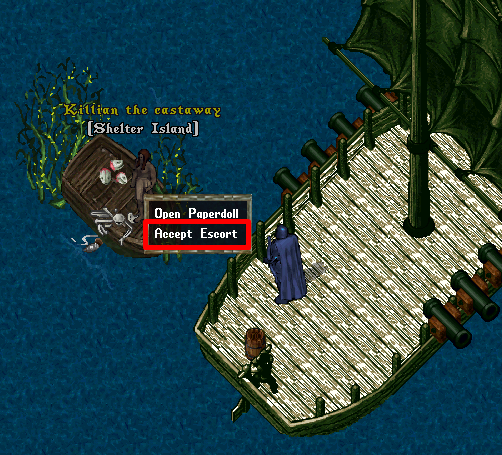
- Players can also say “I will take thee” to accept a Castaway on their ship
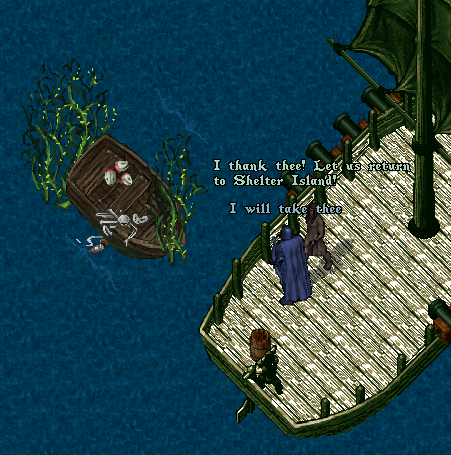
Castaways on Ships
- Players will not be able to accept a Castaway on a Ship if any hostile creatures are present on the ship
- Players can accept Castaways from an another player’s ship if that ship is unoccupied or the player is considered friendly to that ship
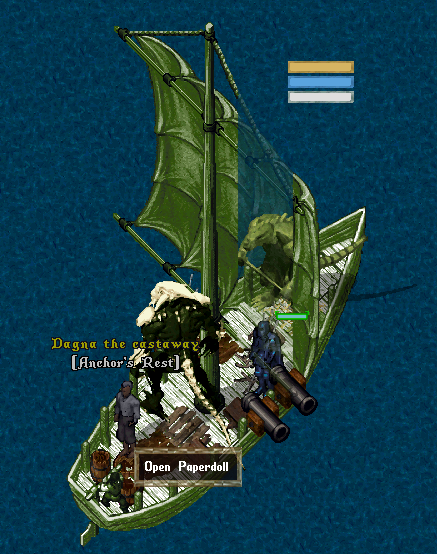
Passenger Limits
- Players can have at most 2 Castaways on board their ship at a time
Abandoning Castaways
- Players can Abandon a Castaway by shift-clicking and selecting the “Abandon Escort” menu option
- Abandoning a Castaway will delete the NPC
- If a ship ever sinks or docks, all Castaways on board the ship will automatically be treated as being Abandoned (deleted)
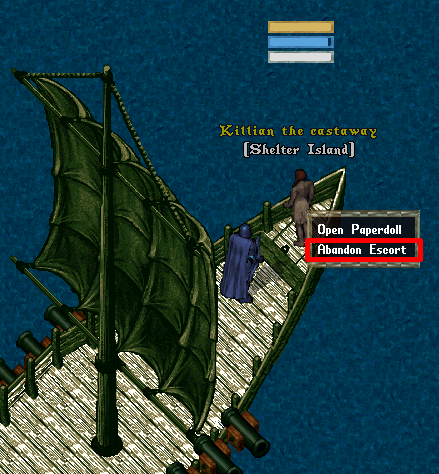
Rescuing Castaways
- To rescue a Castaway, players must sail them to the Town listed for the NPC which is displayed on single-click
- A rescue is completed if the NPC enters the Guard Zone of the listed town, or the player double-clicks a Dockmaster within the Town
- Note: The Guard Zone in some coastal towns do not extend far into the ocean, so the player should use a Dockmaster in these locations (each town should have several reachable)
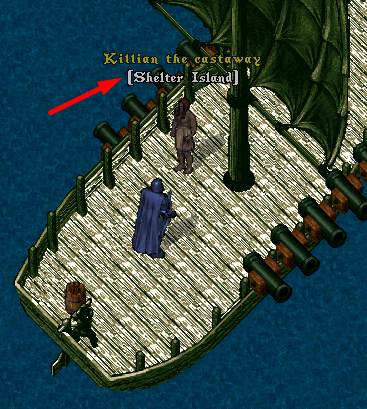
Rescue Reward
- When a player successfully rescues a Castaway, a random Ship Upgrade or Crewmember Contract added into their ship’s Pending Salvage

Achievements
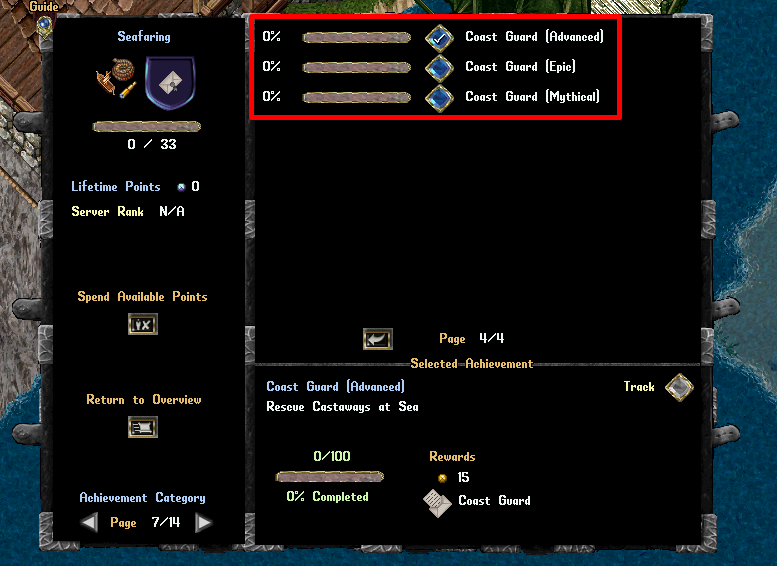
- Players can now complete the “Coast Guard” achievement for rescuing Castaways under the Seafaring category
Society Jobs
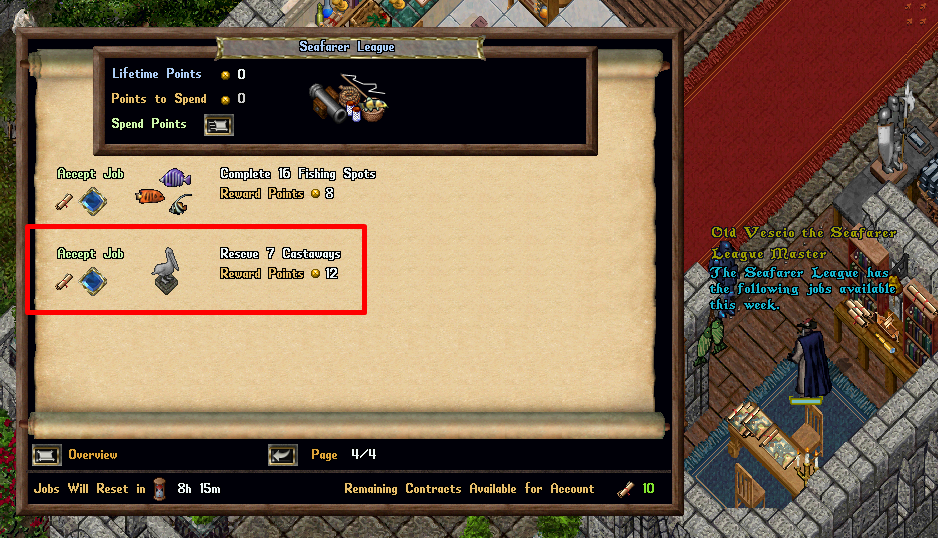
- Each week there will be 1 randomized difficulty “Rescue Castaways” Society Job available for the Seafarer League
Ocean Bosses and Mini-Bosses
- There can now be up to 3 Ocean Mini-Bosses spawned in the world at time simultaneously between natural spawns and guild-spawned versions
- There can now be up to 3 Ocean Bosses spawned in the world at time simultaneously between natural spawns and guild-spawned versions
- Ocean Bosses and Mini-Bosses will never spawn within 200 tiles of an existing Ocean Mini-Boss/Boss
Arenas
Reward Points
- Players now earn 4 Reward Points for participation in a tournament (previously was 3)
- Players now earn 6 Reward Points per winning round in a 1 vs 1 tournament (previously was 5)
- Players now earn 12 Reward Points per winning round in a 2 vs 2 tournament (previously was 10)
Arena Rewards
Players can now purchase new Clothing items as Arena Rewards
- Death Mask (Mask that counts as Exceptional Quality Leather Cap)
- Victory Amulet (Necklace Layer)
- Victory Bracelet (Bracelet Layer)

- Victory Sash (Outer Body Layer)
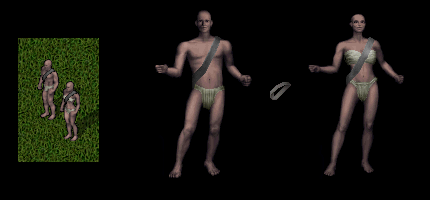
- Arena Torch
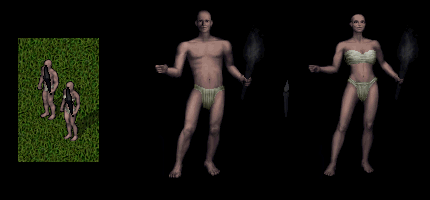
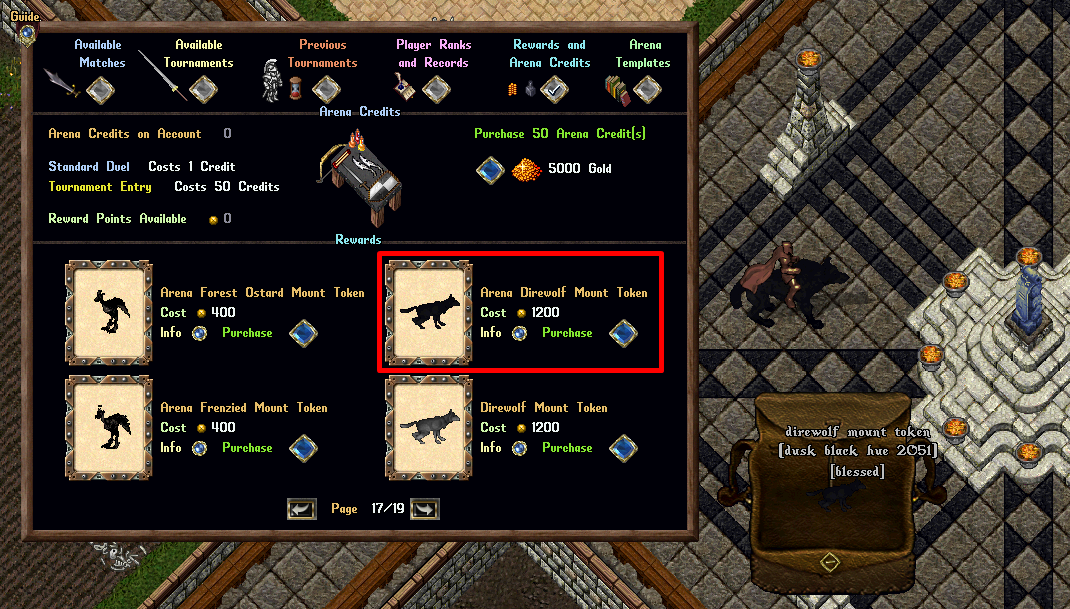
Arena Direwolf Mount Token
- Players can now purchase an Arena-hue Direwolf Mount Token as an Arena Reward
Arena Trophies
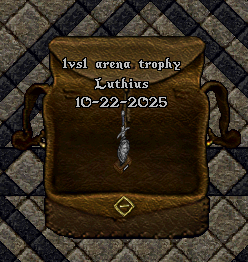
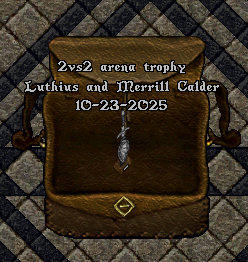
- Upon completion of any Arena Tournament (non-Boxing) the winning players will now automatically receive an Arena Trophy in their backpack
- Arena Trophies list the tournament type, the players on the winning team, and the date of the tournament
- Arena Trophies are temporarily blessed for 60 minutes
Arena Headstone
- Players can now purchase Arena Headstones as an Arena Reward
- Arena Headstones are Blessed items that players can use to celebrate victory in combat
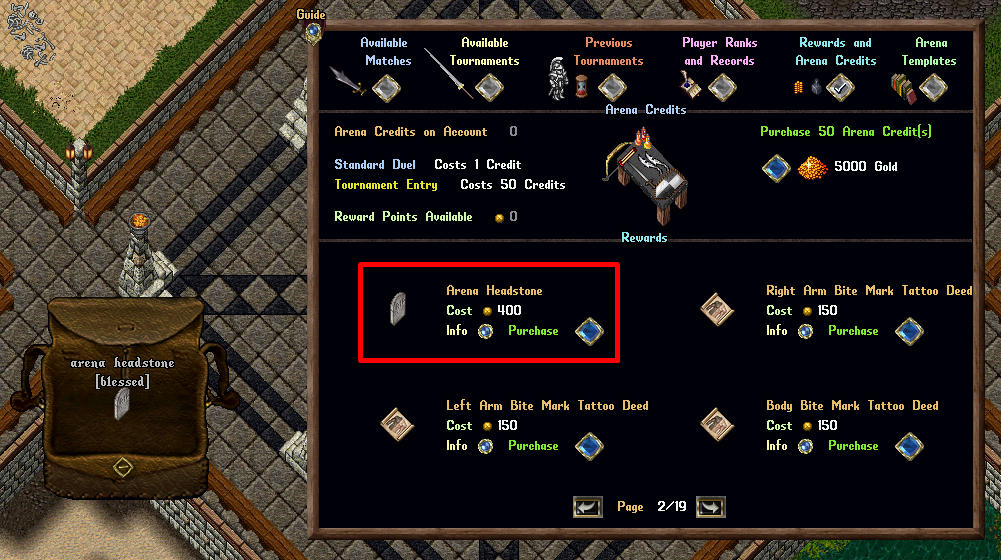
- If a player is within 4 tiles of a corpse of a player they landed the killing blow on, they can double-click an Arena Headstone and target the location
- This will place a temporary Headstone graphic at the corpse’s location that when single-clicked will display details of the death
- The temporary headstone graphic will last for 30 minutes (unless the location features item-removal mechanics such as arena pits, etc)

- Players can only use Arena Headstones once every 30 minutes
- Players can single-click their Arena Headstone to see how long they have until they can use one again
Battle Tattoo Deeds
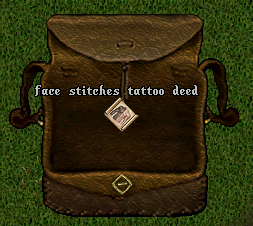
- Players can now purchase Battle Tattoo Deeds which are available for purchase as Arena Rewards and PvP Event Rewards

- Battle Tattoos come in Deed form and must be double-clicked and target the player to unlock them
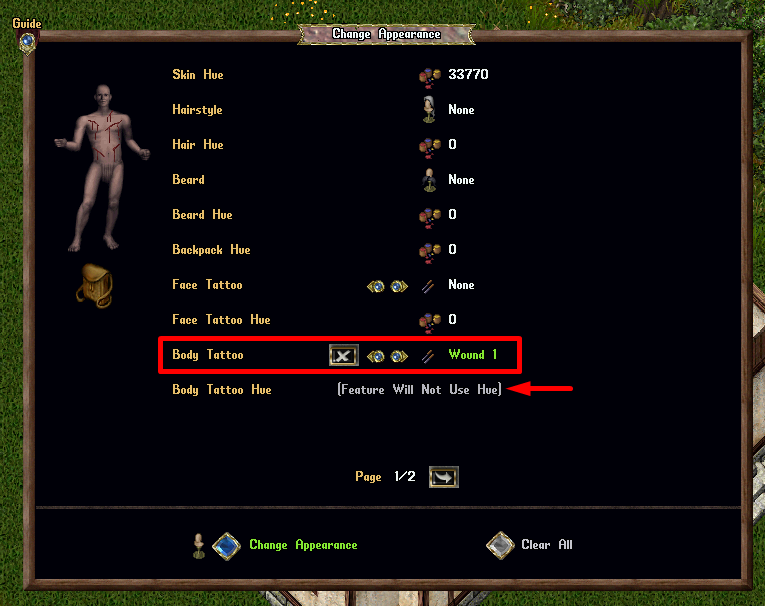
- Once unlocked, players can apply unlocked Battle Tattoos with the Change Apperance menu available from any Prevalia Stylist, Wigstand, or Vanity Travel Kit
- Battle Wounds will not adopt Tattoo Hues (because they are skin-colored) and will display (Feature Will Not Use Hue) for hue selection
Faction Rewards
Faction Clothing
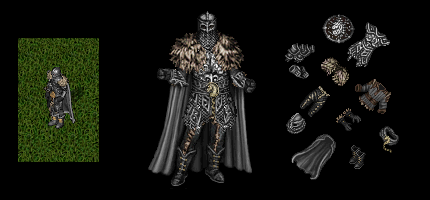
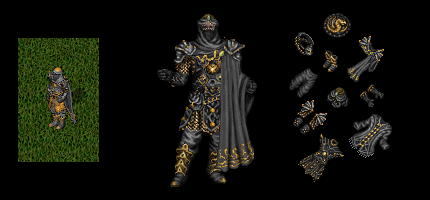
- Players can now purchase a large number of new Faction Clothing items from Faction Rewards
- Players do not have to be a member of Factions in order to wear the clothing
- Players can mix and match clothing items from any of these sets freely
Andarian Clothing Set
Cambrian Clothing Set
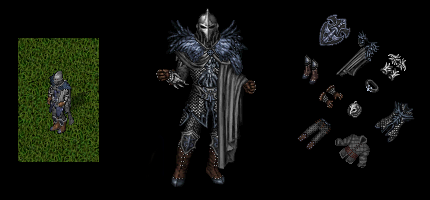
Prevalian Clothing Set
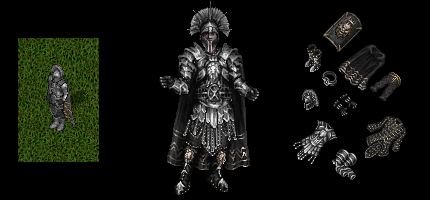
Terran Clothing Set
Faction Shield Covers
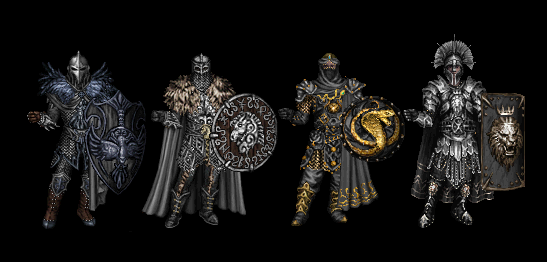
- Players can now purchase Faction Shield Covers from Faction Rewards
- Players do not have to be a member of Factions in order to utilize Faction Shield Covers
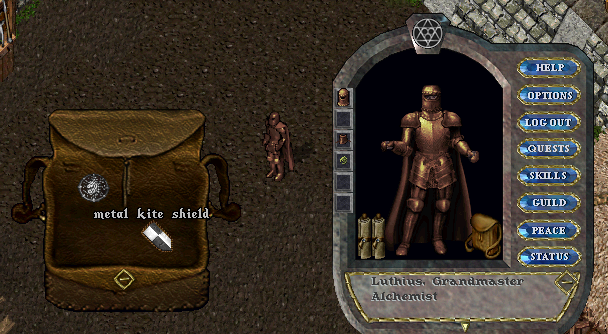
- Shield Covers allow a player to automatically restyle a Shield they equip, of any type, to appear like a Faction Shield
- Shield Covers are Blessed items and must be kept in a player’s Backpack or Adventurer’s Satchel to be utilized
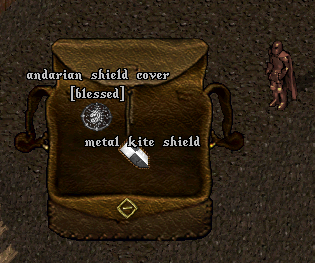
- Whenever a player equips a Shield, if they have a Shield Cover in their backpack (or Adventure’s Satchel), the equipped Shield will automatically adopt the graphic and hue of their Shield Cover

- When the player unequips or drops the Shield (or dies) the Shield will return to its normal graphic and hue
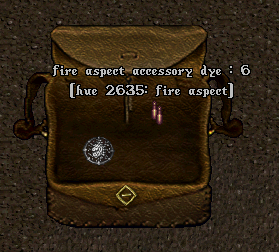
- Players can dye Shield Covers with Accessory Dyes, but it will take 6 Dyes rather than 1
Faction Decorations
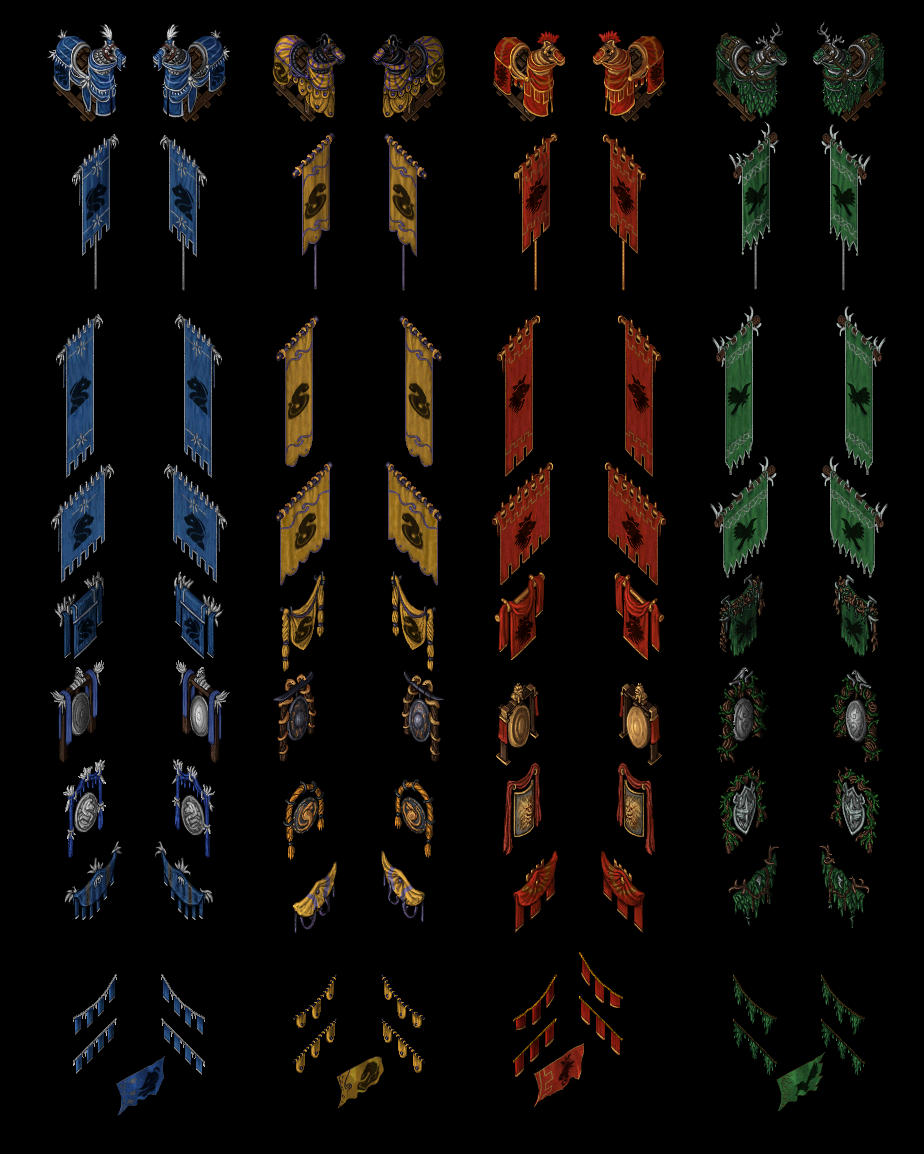
- Players can now purchase a large number of new Faction Decoration items from Faction Rewards
Visual Style Arrows
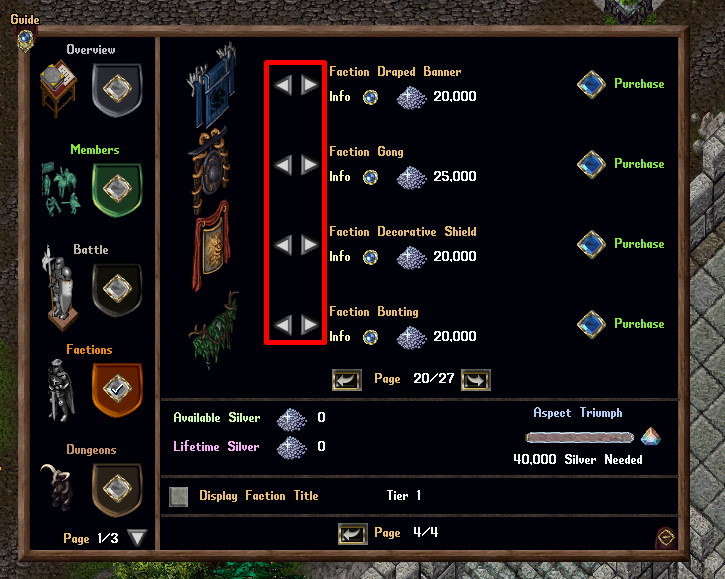
- For Faction Reward Items that can be rotated/restyled to display different visual styles specific to each Faction, there will now be Left/Right arrows available for players to preview the different graphics for the item in each Faction’s visual style
- When players purchase these types of items, it will adopt the visual style they last selected in the menu
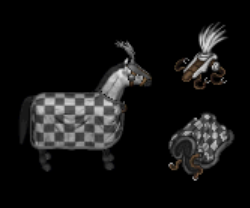
Faction Mount Gear
The following new Mount Gear items are available for purchase from Faction Rewards:
- Grand Checkered Caparison (Caparison Layer)
- Fine Checkered Caparison (Caparison Layer)
- Plumed Champron (Head Barding)
Screenshots
Latest Patches
- Patch Notes for May 11, 2026 05/12/2026
- TEST SHARD Testing Patch - PvM Rebalances 05/12/2026
- Patch Notes for May 1, 2026 05/01/2026
Outlands Events
Latest Discussions
- Patch Notes for May 11, 2026 05/12/2026
- Wonderful UO Renaissance music for UO Outlands 05/10/2026
- UI Grid 05/09/2026


